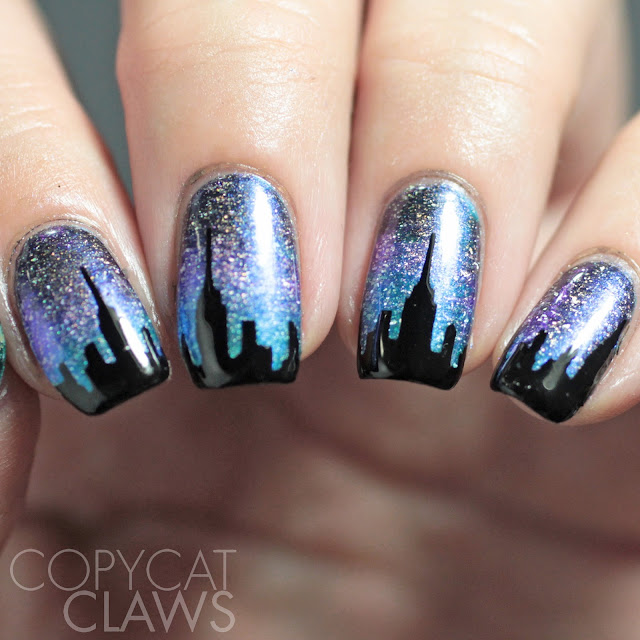
Hey there! I hope everyone had a great weekend. Mine was fun but I think I need another weekend to sleep! I actually spent all day yesterday playing with some new Whats Up Nails products but today I'm sharing some that I used not quite as recently. I'm a big fan of their nail stencils so it's a good thing they have such a big variety of them to pick from. Here I used the City, Citrus, Aztec and Lightning Stencils. Keep reading to see what I did with them.
$3.75 USD
20 Stencils (8x11mm - 14x20mm)
Okay, do I even have to say anything about how cool these are? I'm a sucker for a city skyline mani and these stencils made it SO easy. I did a quick fan brush gradient with KBShimmer I'm Onyx, Hashtag You're It and No Wave (previously reviewed here). When that was dry I put on the stencils and filled them with KBShimmer Eclipse. I wore this for as a full mani for a day or two and was sad when I had to move on.
Isn't it cool in direct light? So shiny and sparkly! I'm definitely going to be using the rest of these stencils!
$3.75 USD
12 Stencils (22x28mm)
For these I did a pastel gradient with Pretty Serious Peachie Poo and Fluffykins. Then I applied the stencils and gradiented OPI Orange You Stylish and She’s A Bad Muffuletta! and topped with HK Girl. The centres of these did like to hang out. There's a lot of little pieces here so I wasn't shocked. I did put them onto the back of the sheet a couple times and pulled them back up and most of the pieces stuck.
$3.75 USD
12 Stencils (22x28mm)
These Aztec Stencils were a dream to work with compared to how they look! With all those little sharp corners, I thought for sure they wouldn't separate but they did easily. I used my old favourite, Sephora by OPI Mr. Right Now for a dark red base and then used Hit The Bottle Taupe-lessly Devoted over top. I should've let it dry for a second before top coating since the beige did streak.
$3.75 USD
12 Stencils (22x28mm)
For these I used a magnetic polish base, Bow Polish Smile In Your Sleep with white sponged on over the stencils. These stencils were more finicky than others that I've tried. I noted that the bolts didn't want to separate and then when I tried the trick of applying the stencil on the back of the sheet and pulling it back up, one of them tore. But after struggling with a couple, I found the right corner to pull from and they worked easily.
I really did enjoy playing with these, even with the couple of weeding issues. This was my first time with any issue at all (and I'm super picky with stencils since I'm usually a stamper) so I'm not put off by them at all. Interestingly, usually I enjoy full nail designs more (at least with stamping) but when it comes to stencils, I really like the smaller stencils from Whats Up so the city stencils was definitely my favourite here. I have some of the fall and halloween stencils to play with coming up so we'll see if that holds true!
Available at What's Up Nails
'Til next time...


No comments:
Post a Comment